This tutorial will cover how to make a 360 degrees turntable render for an asset or model made in Maya 2015. I am using Arnold Renderer for this, but this will work with any Rendering engine. I will be using Premiere to export the footage, but this can be done in any video editing software.
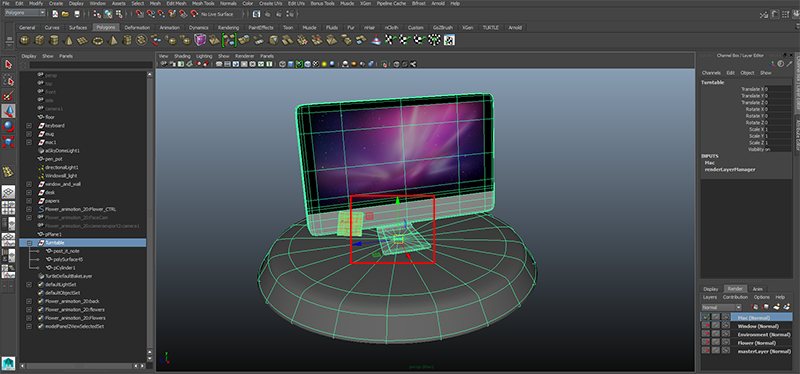
Start off by opening up whatever you want to make into your turntable. If this is in a scene with other props, then make a new render layer for it as I have, by clicking the 'Create new layer and assign selected objects' button that I have highlighted. I named this render layer Mac since that is what I am rendering, so note that if you see this term come up again this is not because I am doing this tutorial from a Mac computer, however this tutorial will transfer between PC and Mac. Also make sure that this render layer is the only thing ticked on to render.

Next make a podium for your model to sit on. This can be as fancy as you like and even textured, but I've kept mine simple for this tutorial. It's best to use a cylinder however so it turns nicely. Then put your model on it and make sure it is centered on the podium.

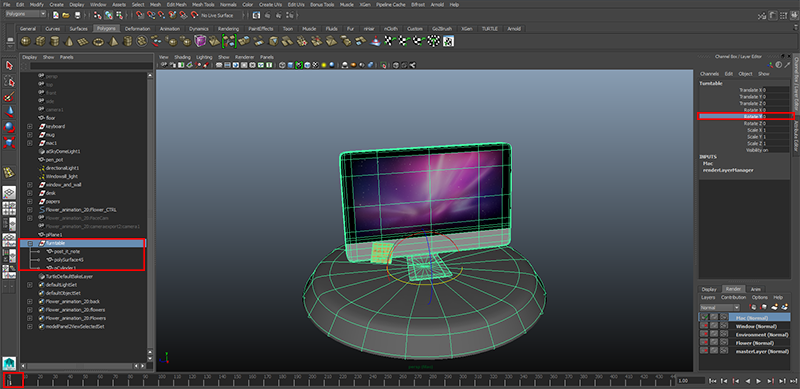
Next you'll want to group the podium and assets together. Do this by hitting Ctrl + G. You'll see this be now grouped in your Outliner. From now on you'll want to only select the Group via the Outliner, rather than the individual models from the Viewport.

Next you'll want to center your rotation axis so it rotates from the center of the podium. To do this click on your manipulators, and then hold down D to move the manipulators, and V to make it snap. You'll want to snap it to the center of your podium.

Next, making sure you have the group selected, and making sure you are at frame 1, you'll want to select the Rotate Y field in the Channel Box.
You'll want to leave it at 0, and then right click and hit Key Selected.

Next go to frame 120, and type in 360 into the Rotate Y field. Again hit Key Selected.

Next you'll want to go to Windows > Animation Editors > Graph Editor.

In the Graph Editor select the curve and then hit the button that is highlighted.
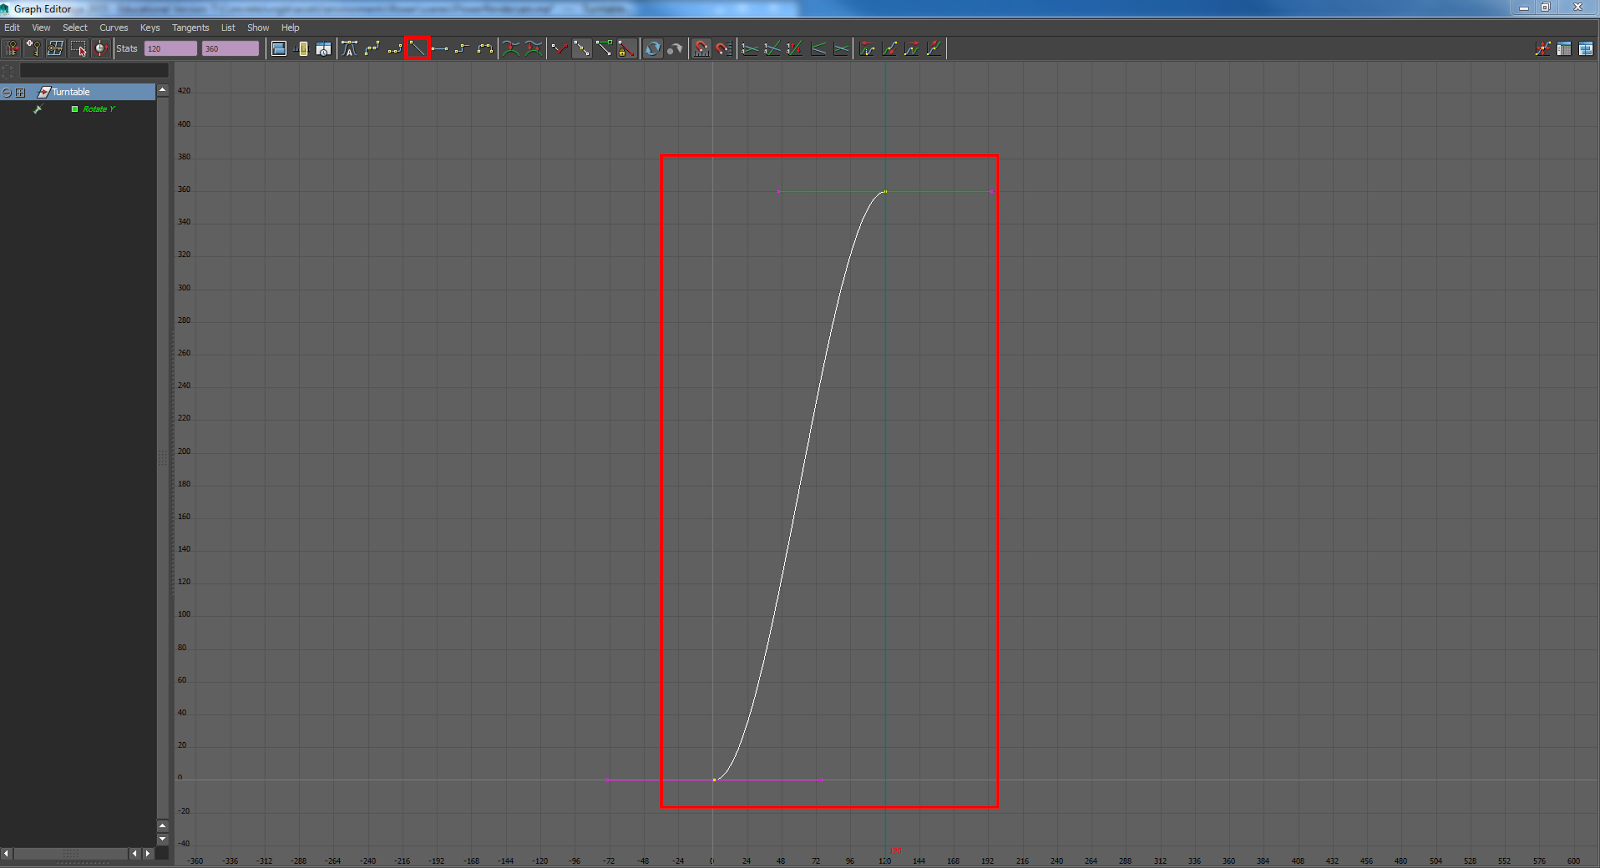
This will straighten the curve out. If you don't do this then the turntable will start slow, quicken in the middle, and then slow down again before ending. If you straighten it it will mean the turntable will be the same speed throughout which I personally prefer. You can play your animation now in the viewport and see if it works (it should turn from the center of the podium).

Next make sure to hit Real Time under Playback Speed in the Preferences settings. You can find this via the button on the far right under the frames in the Wiewport.

Almost done! Now you'll want to make a camera if you haven't already and position your model and podium so they are centered (mine is not here so I had to go back and fix this).

Set up your render settings however you want. I made sure to check it was rendering my correct Render Layer, I renamed the file and chose to do it as a TIF file (even though it says EXR below, EXRs are not compatible with Premiere). I choose name_#.ext for my extension details, and a frame padding of 3. Make sure to make the start frame 1 and end frame 120, and render from the correct camera. I had mine render as a HD_540 since this was just for the tutorial.


When everything is ready and rendering out well in the Render View, go to Rendering > Render and hit Batch Render.

When the renders are done depending on your extension it should render out with a transparent background. Open up a frame to make sure it looks okay in Photoshop.

Since I want a background for my turntable I added that in behind it with the bucket tool and a new layer. I then saved the background out separately without the Render so I can put this into Premiere as a new layer.

After that it is pretty self explanatory. Import your frames into Premiere as a sequence, and then import the background in as a layer behind it.

Then export it out with whatever render settings you desire, here are mine.

And ta da! You have a turntable you can use for your portfolio. Upload it to YouTube to show it off. Mine is below..
For some final touches and to make it more personal I usually add my name and a black border as a top layer in Premiere so everyone will always know it's your work.
No comments:
Post a Comment